
Kitchen Refresh

I am so excited to finally wrap up our kitchen refresh that we started (no joke) over three years ago. We’ve made small changes over time to accommodate our budget, lifestyle, and priorities. We also big believers in not “over renovating,” too - American culture has gotten reno-obsessed in recent years and it’s not good for our environment. Plus, if you do everything at once, it will all become dated at around the same time, too. We’re really happy with where we landed and feel that the expense of the renovations, spread out over a few years, was well worth it to postpone a major renovation for several years while maximizing the lifespan of quality improvements the previous owners made, like our solid-wood cabinets.
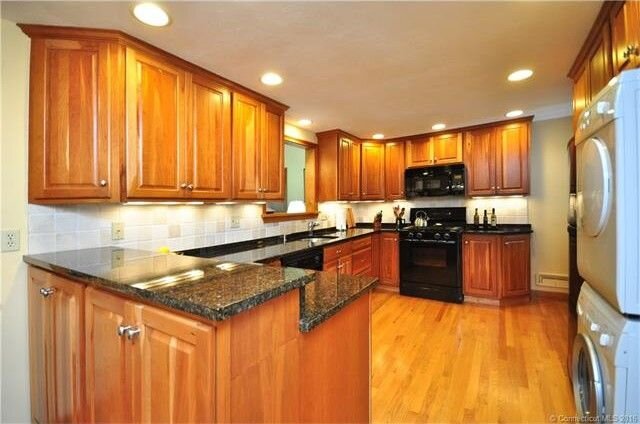
When we moved in 4 years ago, we were thrilled that the kitchen wasn’t original (not un-common in our town of older homes) and relatively classic in layout. That said, it had it’s quirks - there was a tiny stackable washer dryer in the middle of the kitchen, and there are two “windows” overlooking the family room addition that the previous owners designed around vs. rethinking their purpose. Although, I will say, we’ve grown to love them too as you get good light from the family room AND you can watch TV from the sink… so maybe that’s why they left them :) There was also an eat-in area but it was too small to really be functional and was squished next to a bar-height cabinet that was both inaccessible and annoying (we’d hit it with our chairs and our elbows). The kitchen and family room were also the last rooms in the home that had wood trim - the rest of the house had been painted white. Here are some before photos:
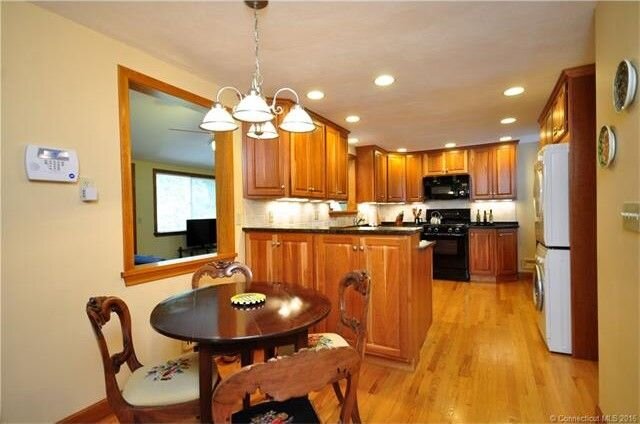
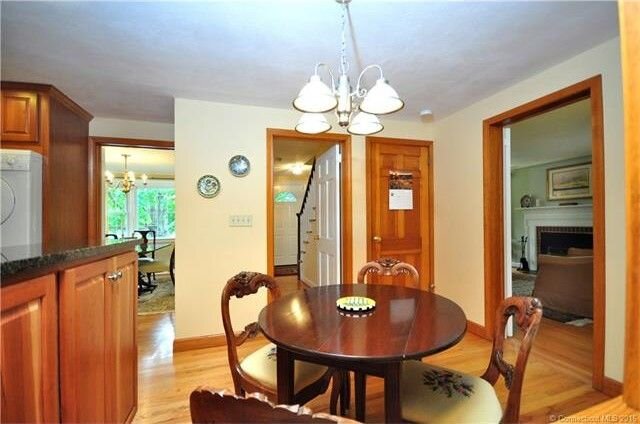
When we first moved in, we quickly replaced the light fixture in the eat-in area and painted both the trim (Simply White by Benjamin Moore, which they also used in the rest of the house) and walls (Fog Mist by Benjamin Moore). Then we sat down and made a list of things to get quotes for and eventually tackle, pending cost:
Move washer/dryer down to the basement (required adding plumbing as the basement didn’t have hookups…$$$)
Expand doorway to dining room to open up the space once washer/dryer cabinet is empty
Backsplash
Paint cabinets
Replace hardware and lighting
Replace faucet
Reconfigure bar-height cabinet to actual counter space
We felt that these changes, over time, would allow us to enjoy our kitchen and really live with it for awhile to understand what we’d want when investing in a full renovation down the line. It also limited our waste and maximized the lifespan on the existing space (and materials).
I should also note that all of the appliances are from the late 90’s, but they worked fine when we moved in so we decided to only replace them as they stopped working. So far, we’ve had to replace the dishwasher and fridge. We also had to buy a new washer and dryer when we moved them to the basement, but we knew we’d need to upgrade to full size machines regardless, especially once Nell arrived!
A few years ago we finally took the first step and had hook ups installed in the basement. This was a large plumbing expense (I believe around $3,000) as it required a pump and sink to accommodate. Along with new machines, this was the priciest home project we’ve taken on to date so we didn’t do much else with the kitchen for the rest of that year. That meant we had to live with a pretty ugly unfinished wall and open cabinet in our kitchen for awhile:

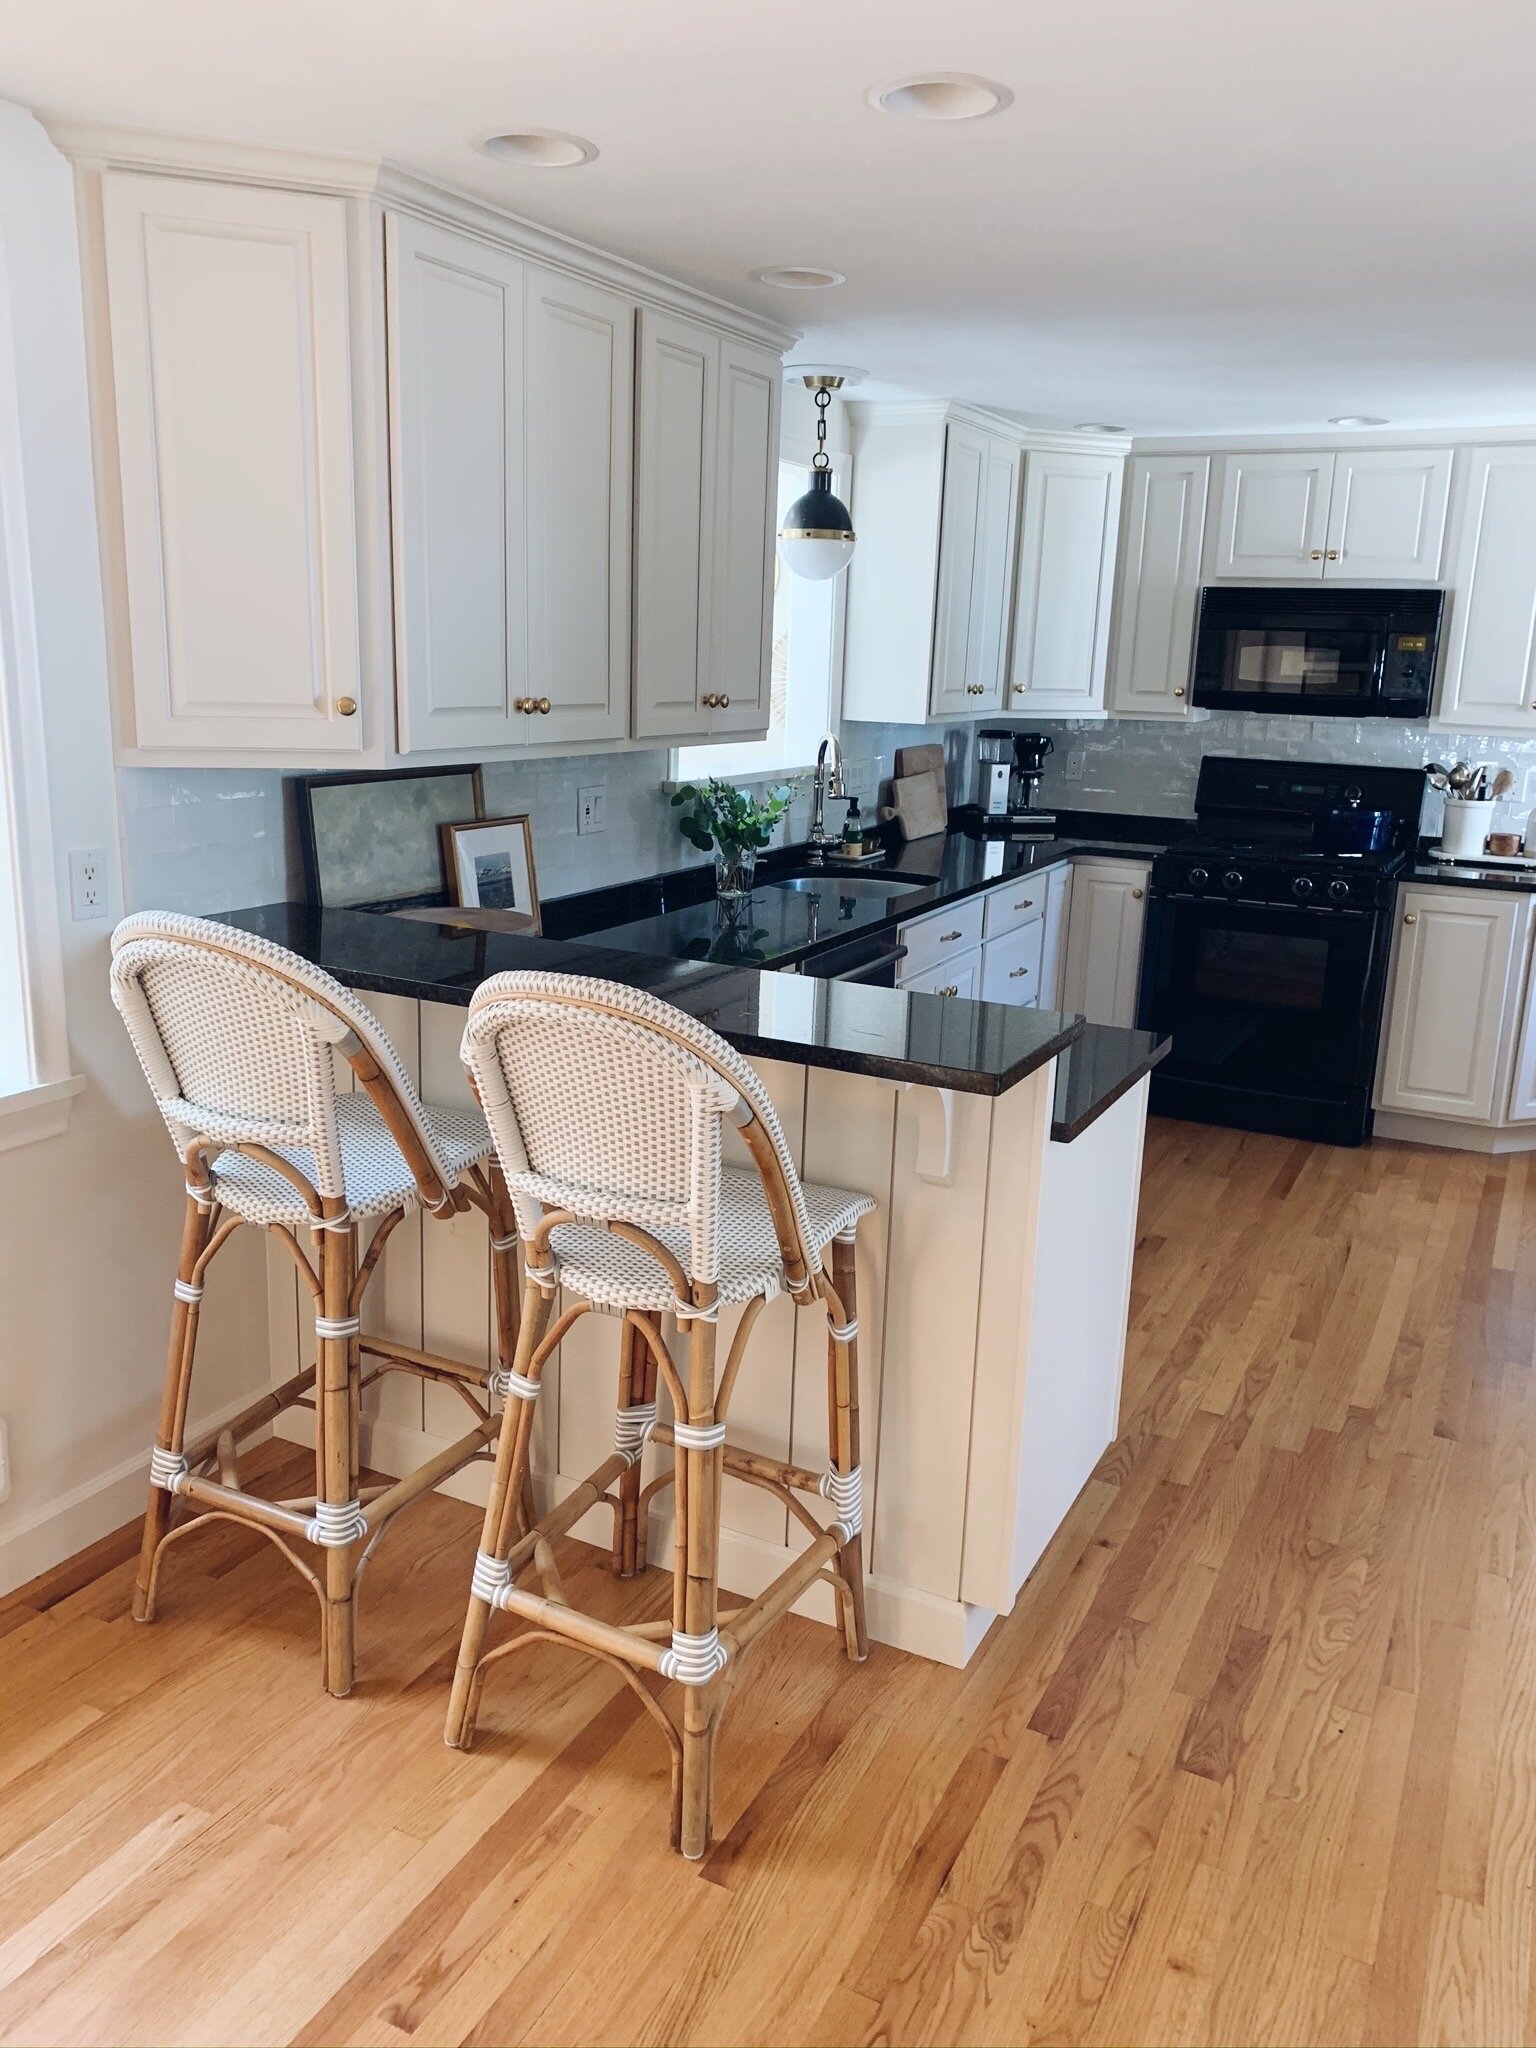
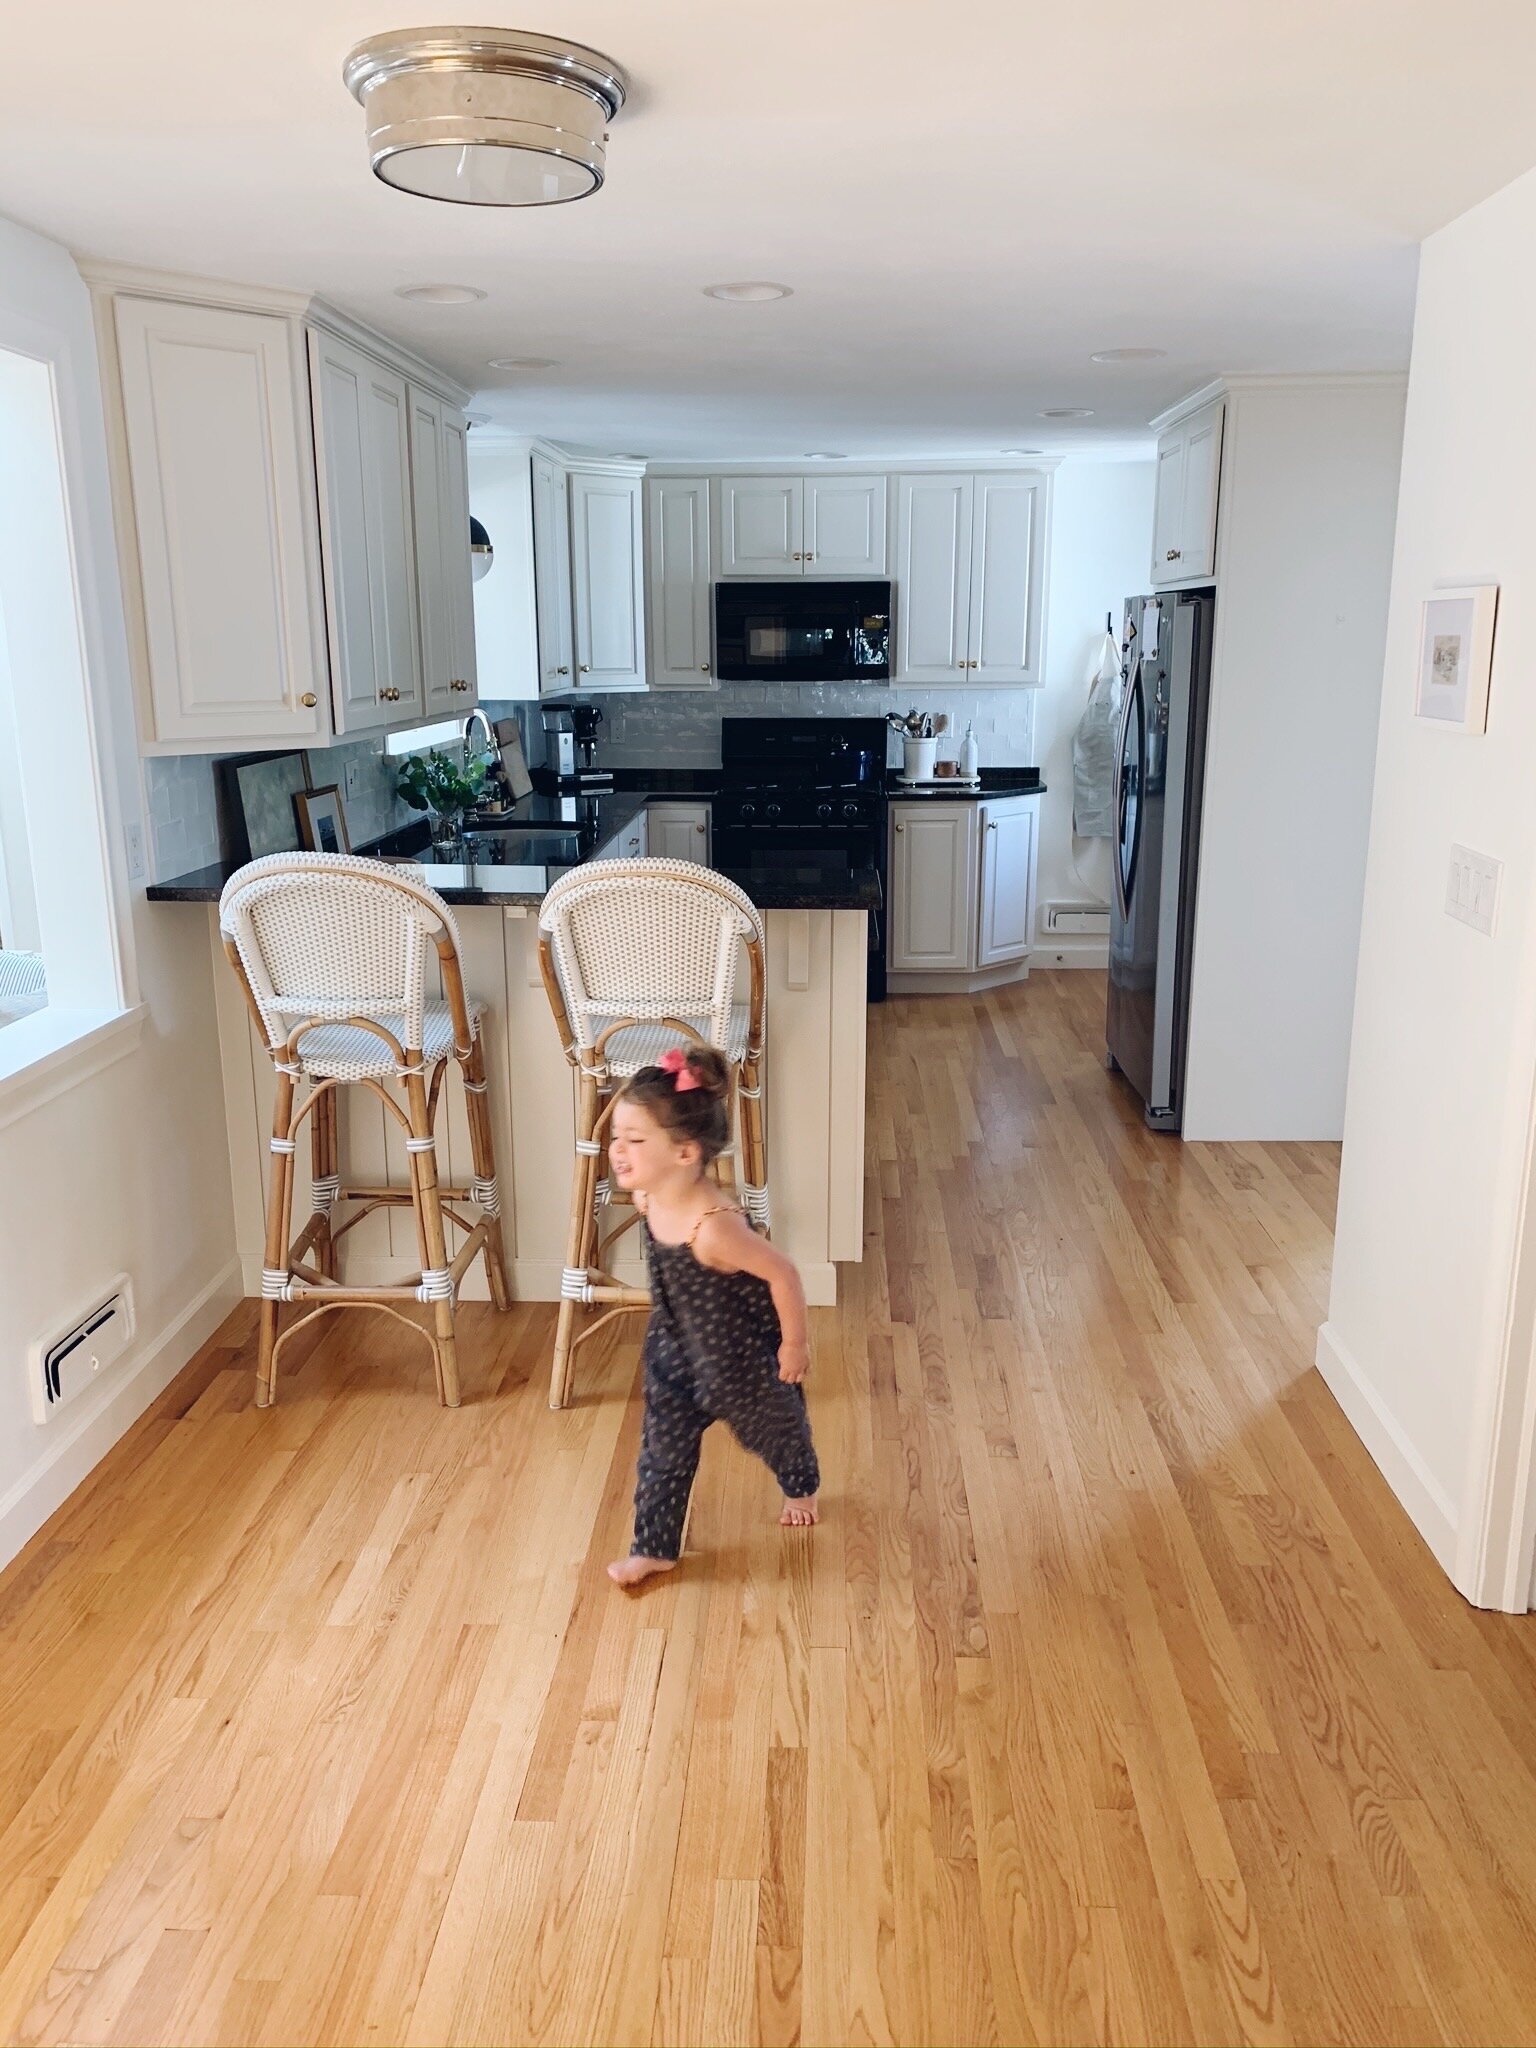
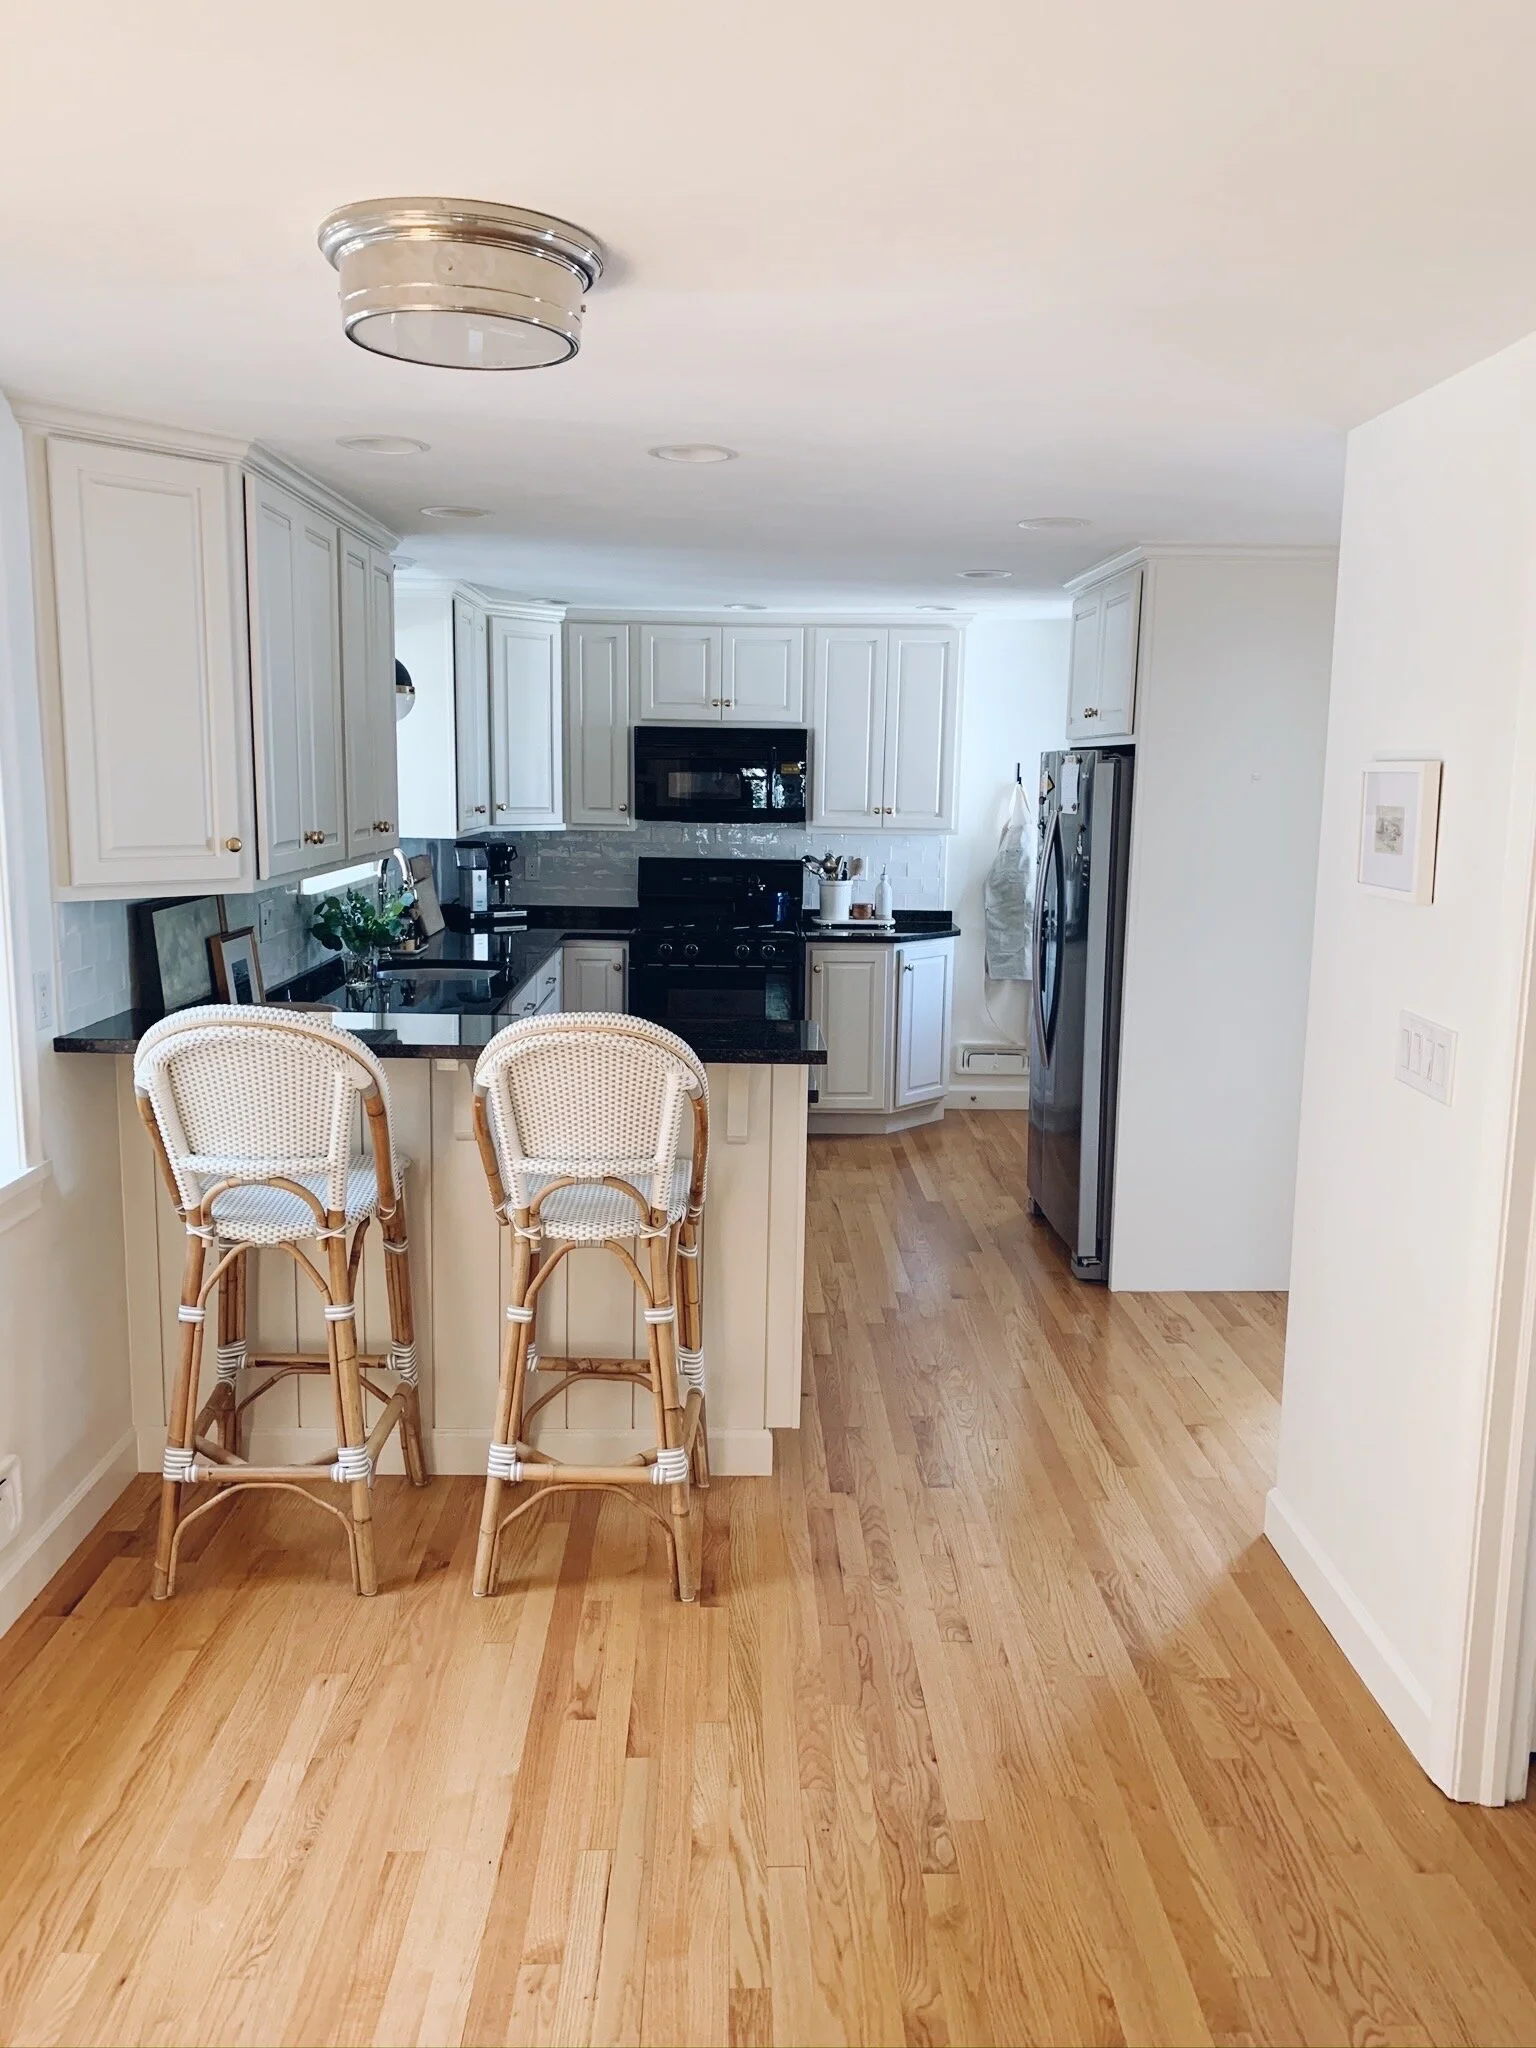
After replenishing our home fund a bit we moved forward with opening this wall up. Because the plumbing air vent for our entire house runs right next to the fridge, we couldn’t go as wide as we had hoped. Regardless, this project made SUCH a difference and really lightens up the kitchen! The kitchen is essentially in the middle of the house so it doesn’t get great light. Anyway - here is the entrance to the dining room post-reno- totally worth the wait!:

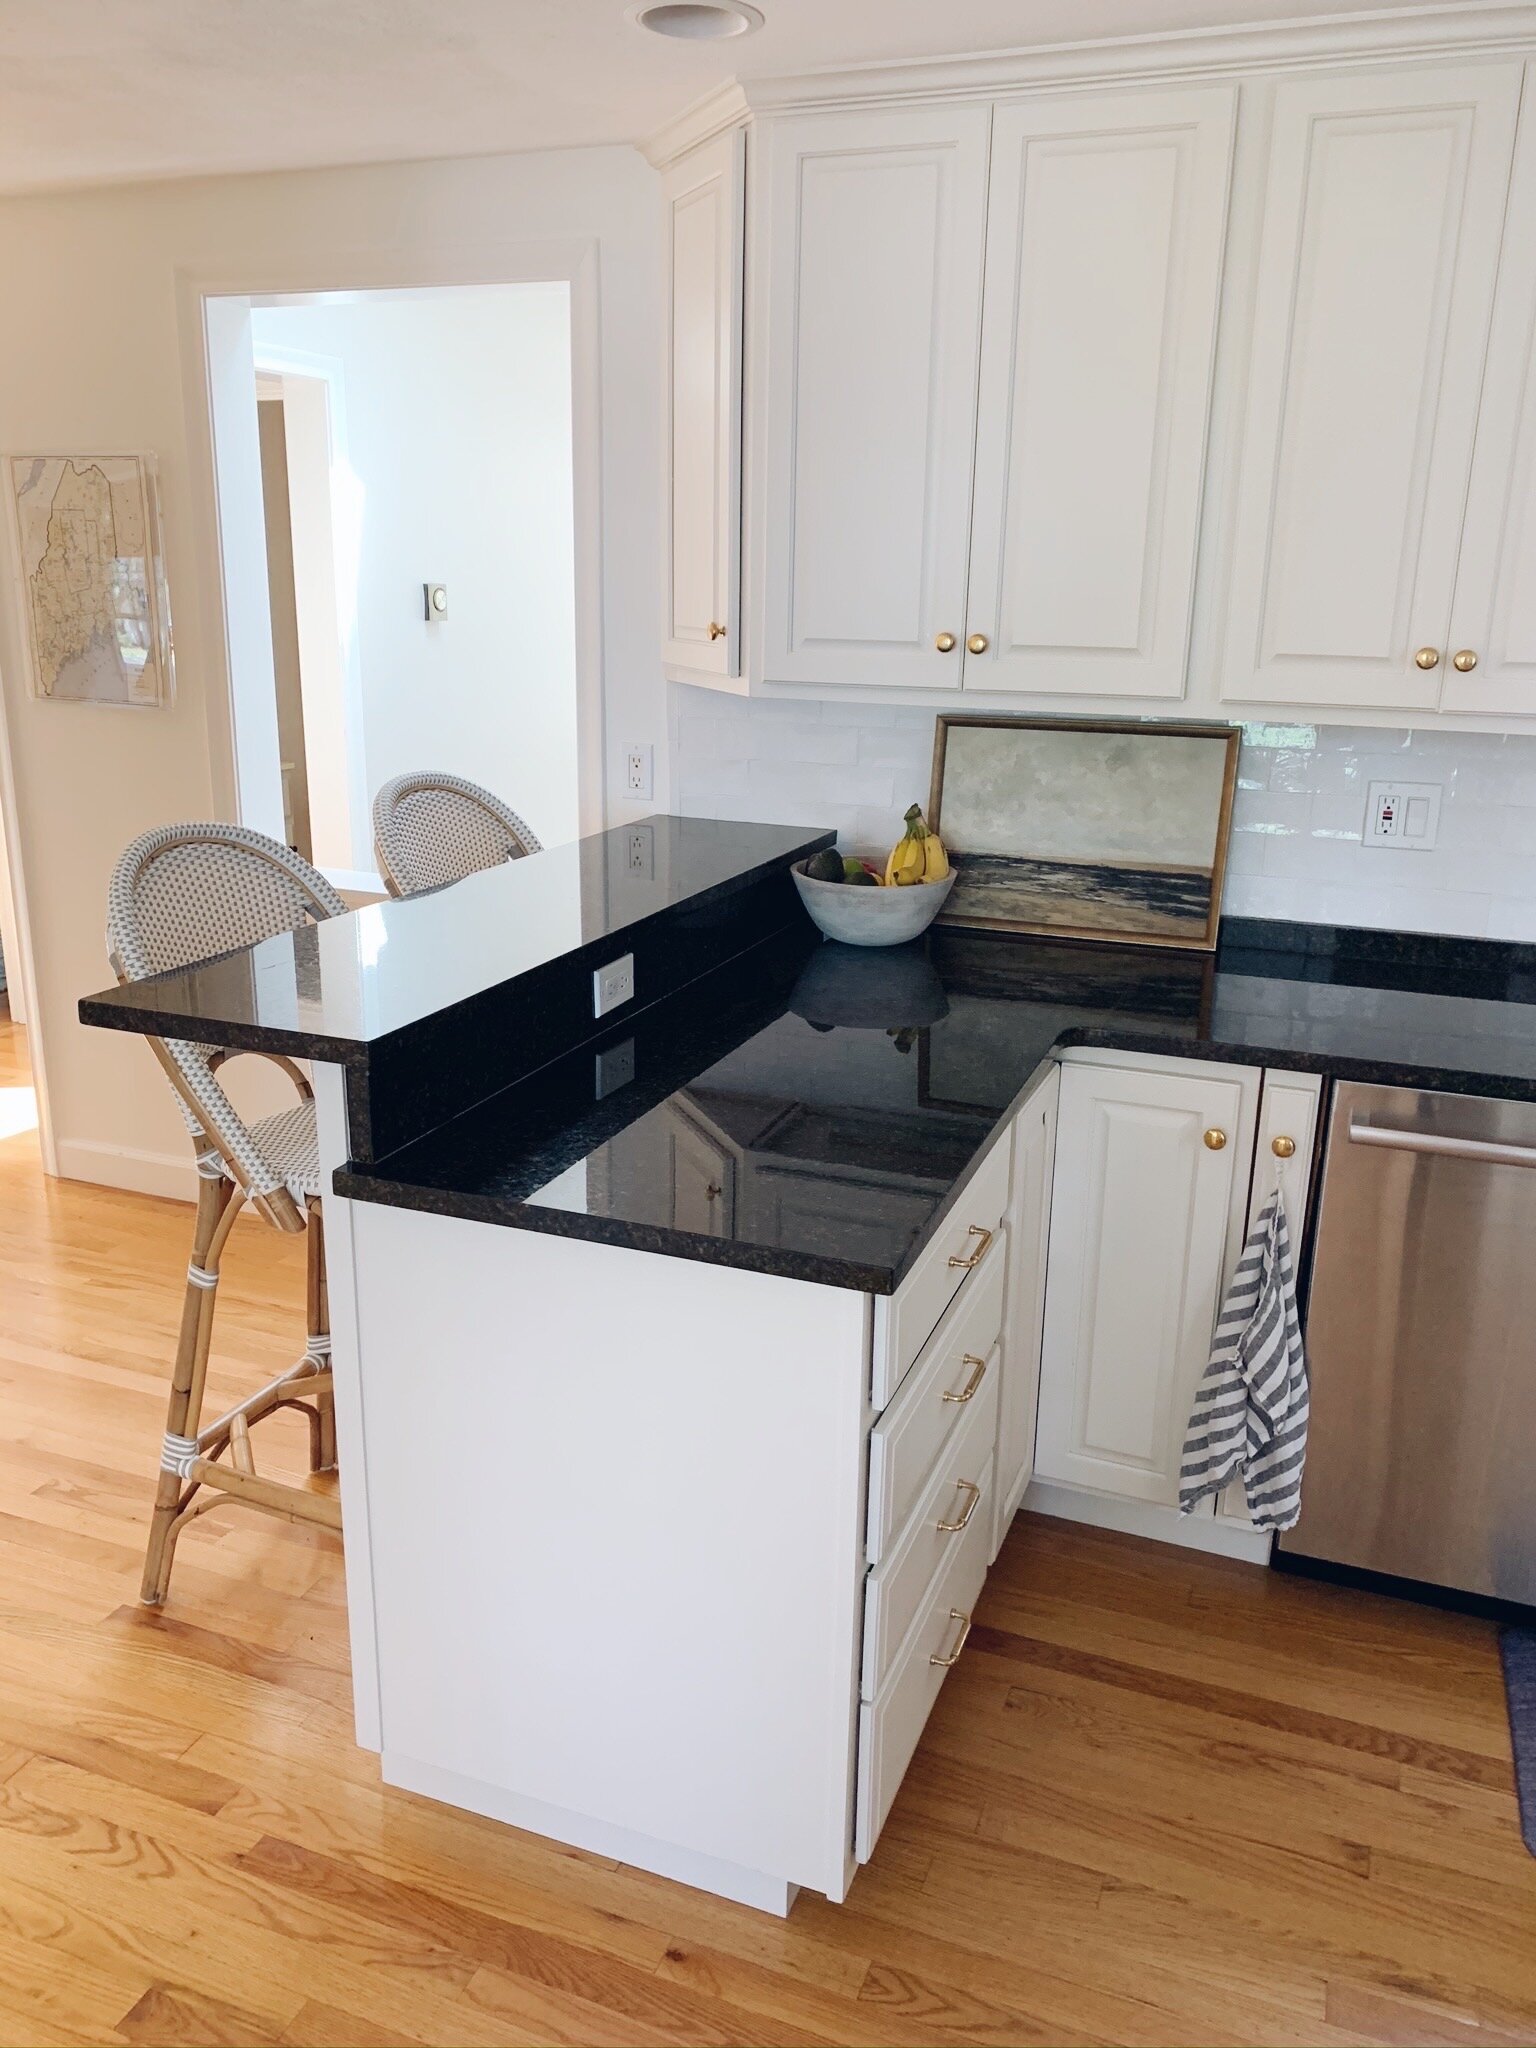
Next up was the backsplash and counter re-configuration. After opening up this space we went from never using the dining to using it for every meal! It’s so much more comfortable than our squished eat in area and it’s the brightest room in the house. Because of this we felt totally comfortable converting the counter to a breakfast bar and eliminating the eat-in area all together. To be TRIPLE sure, I ripped the doors off the cabinets and added stools to “try it out” - C was…confused but he’s used to my spastic home projects by now :) You can see that stage of our kitchen here.
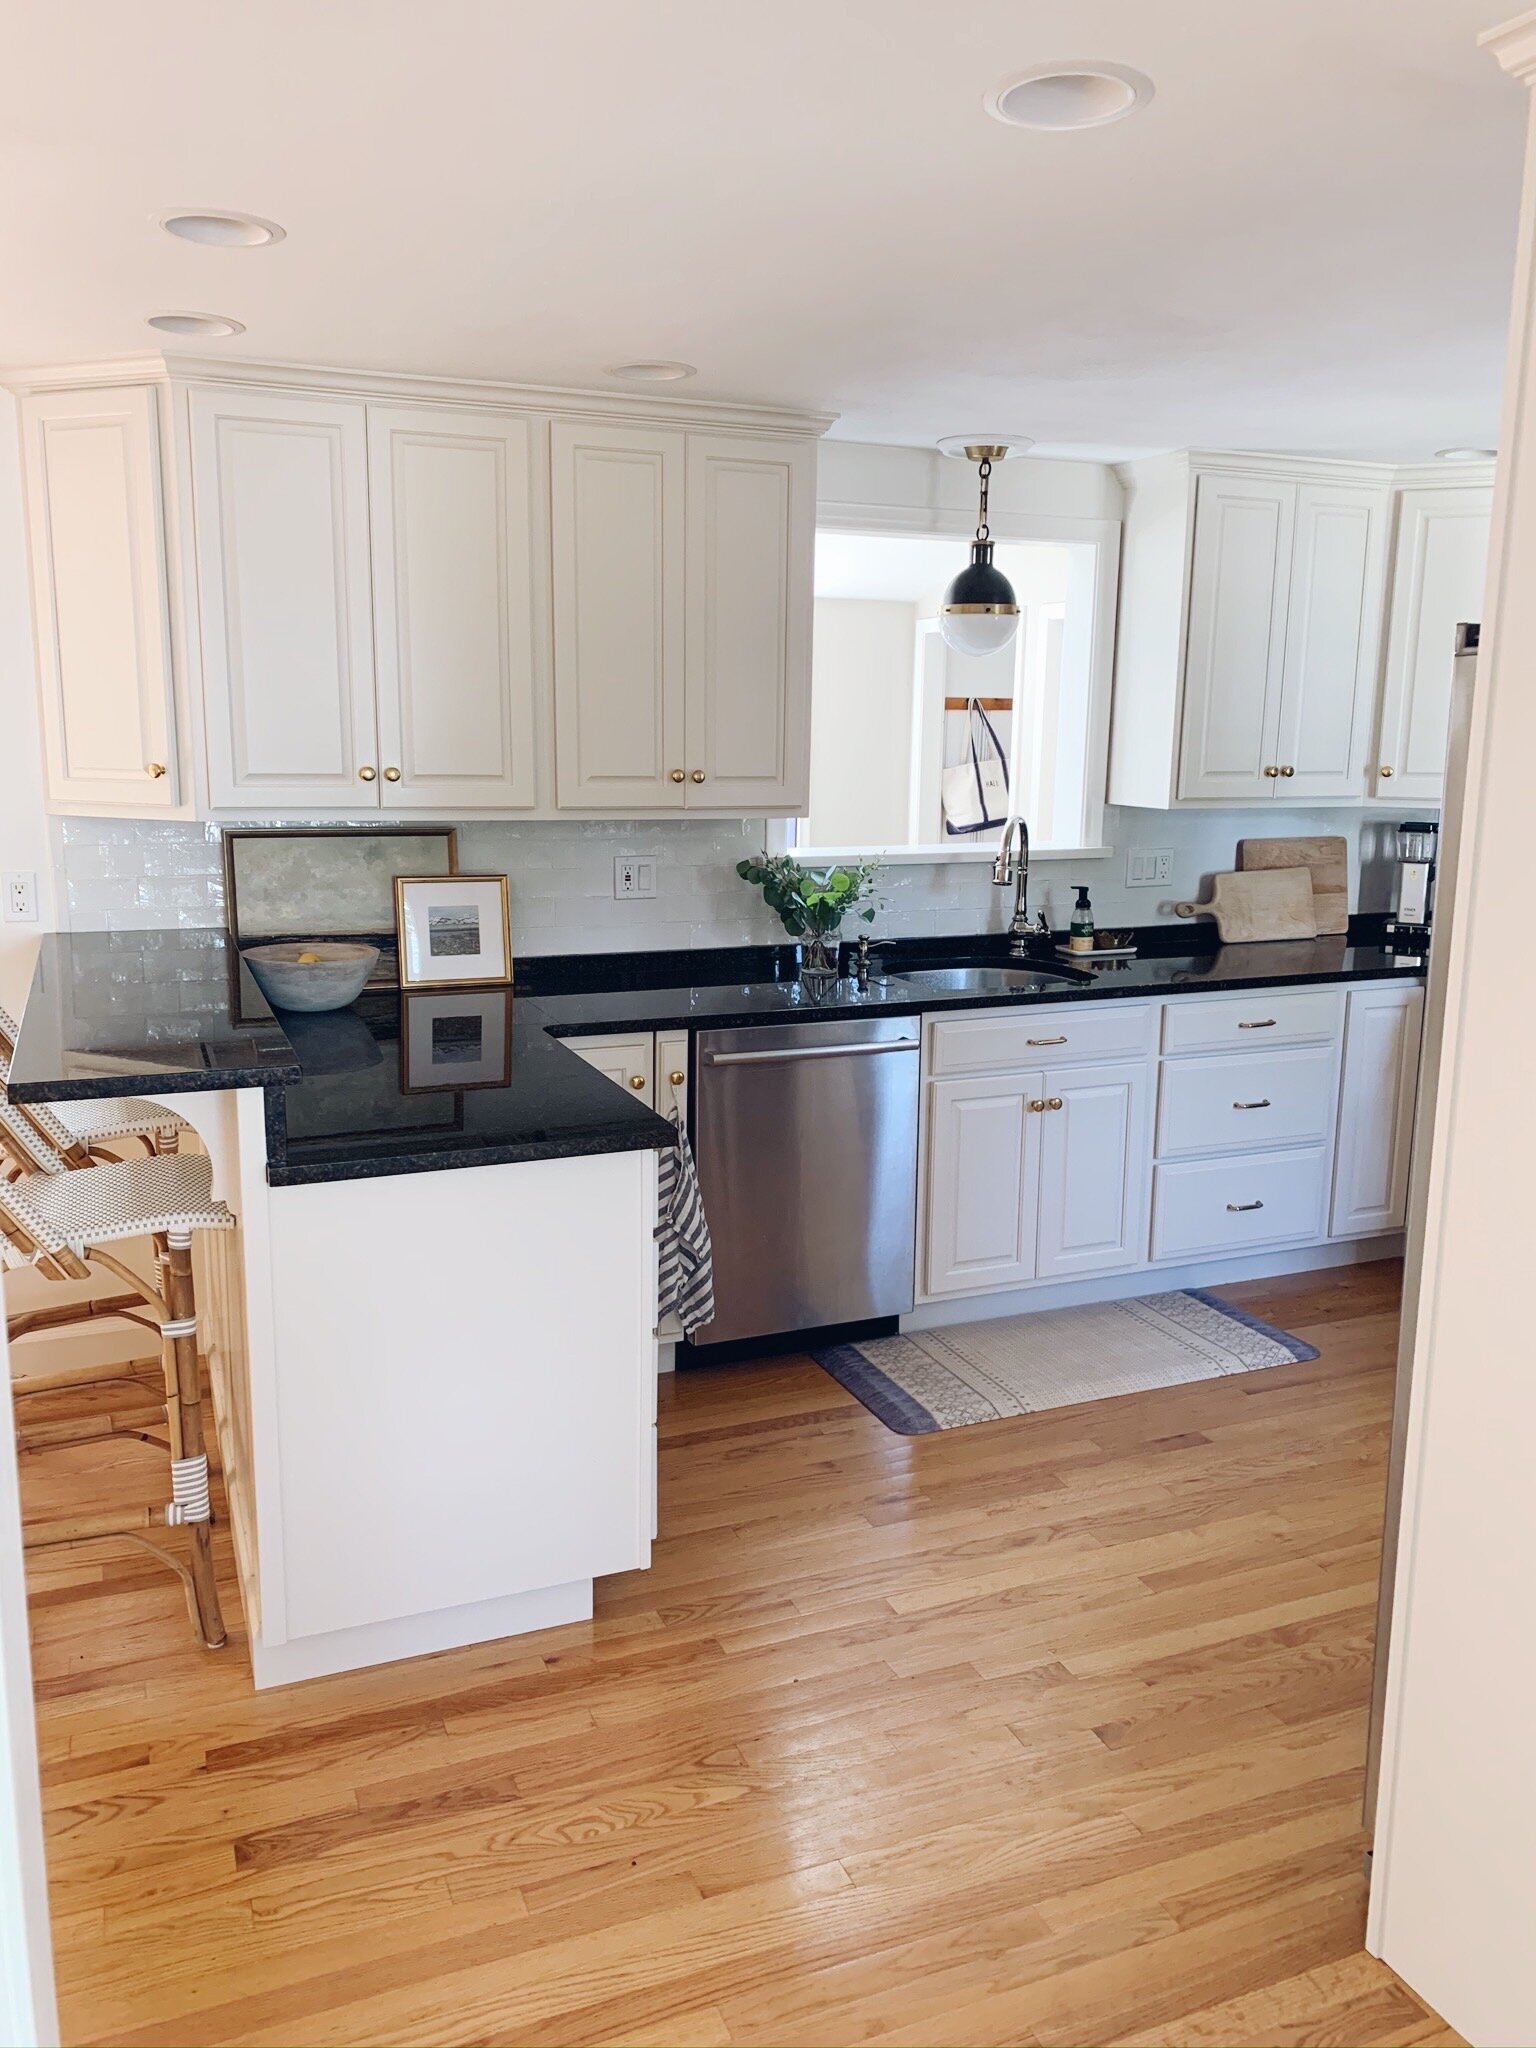
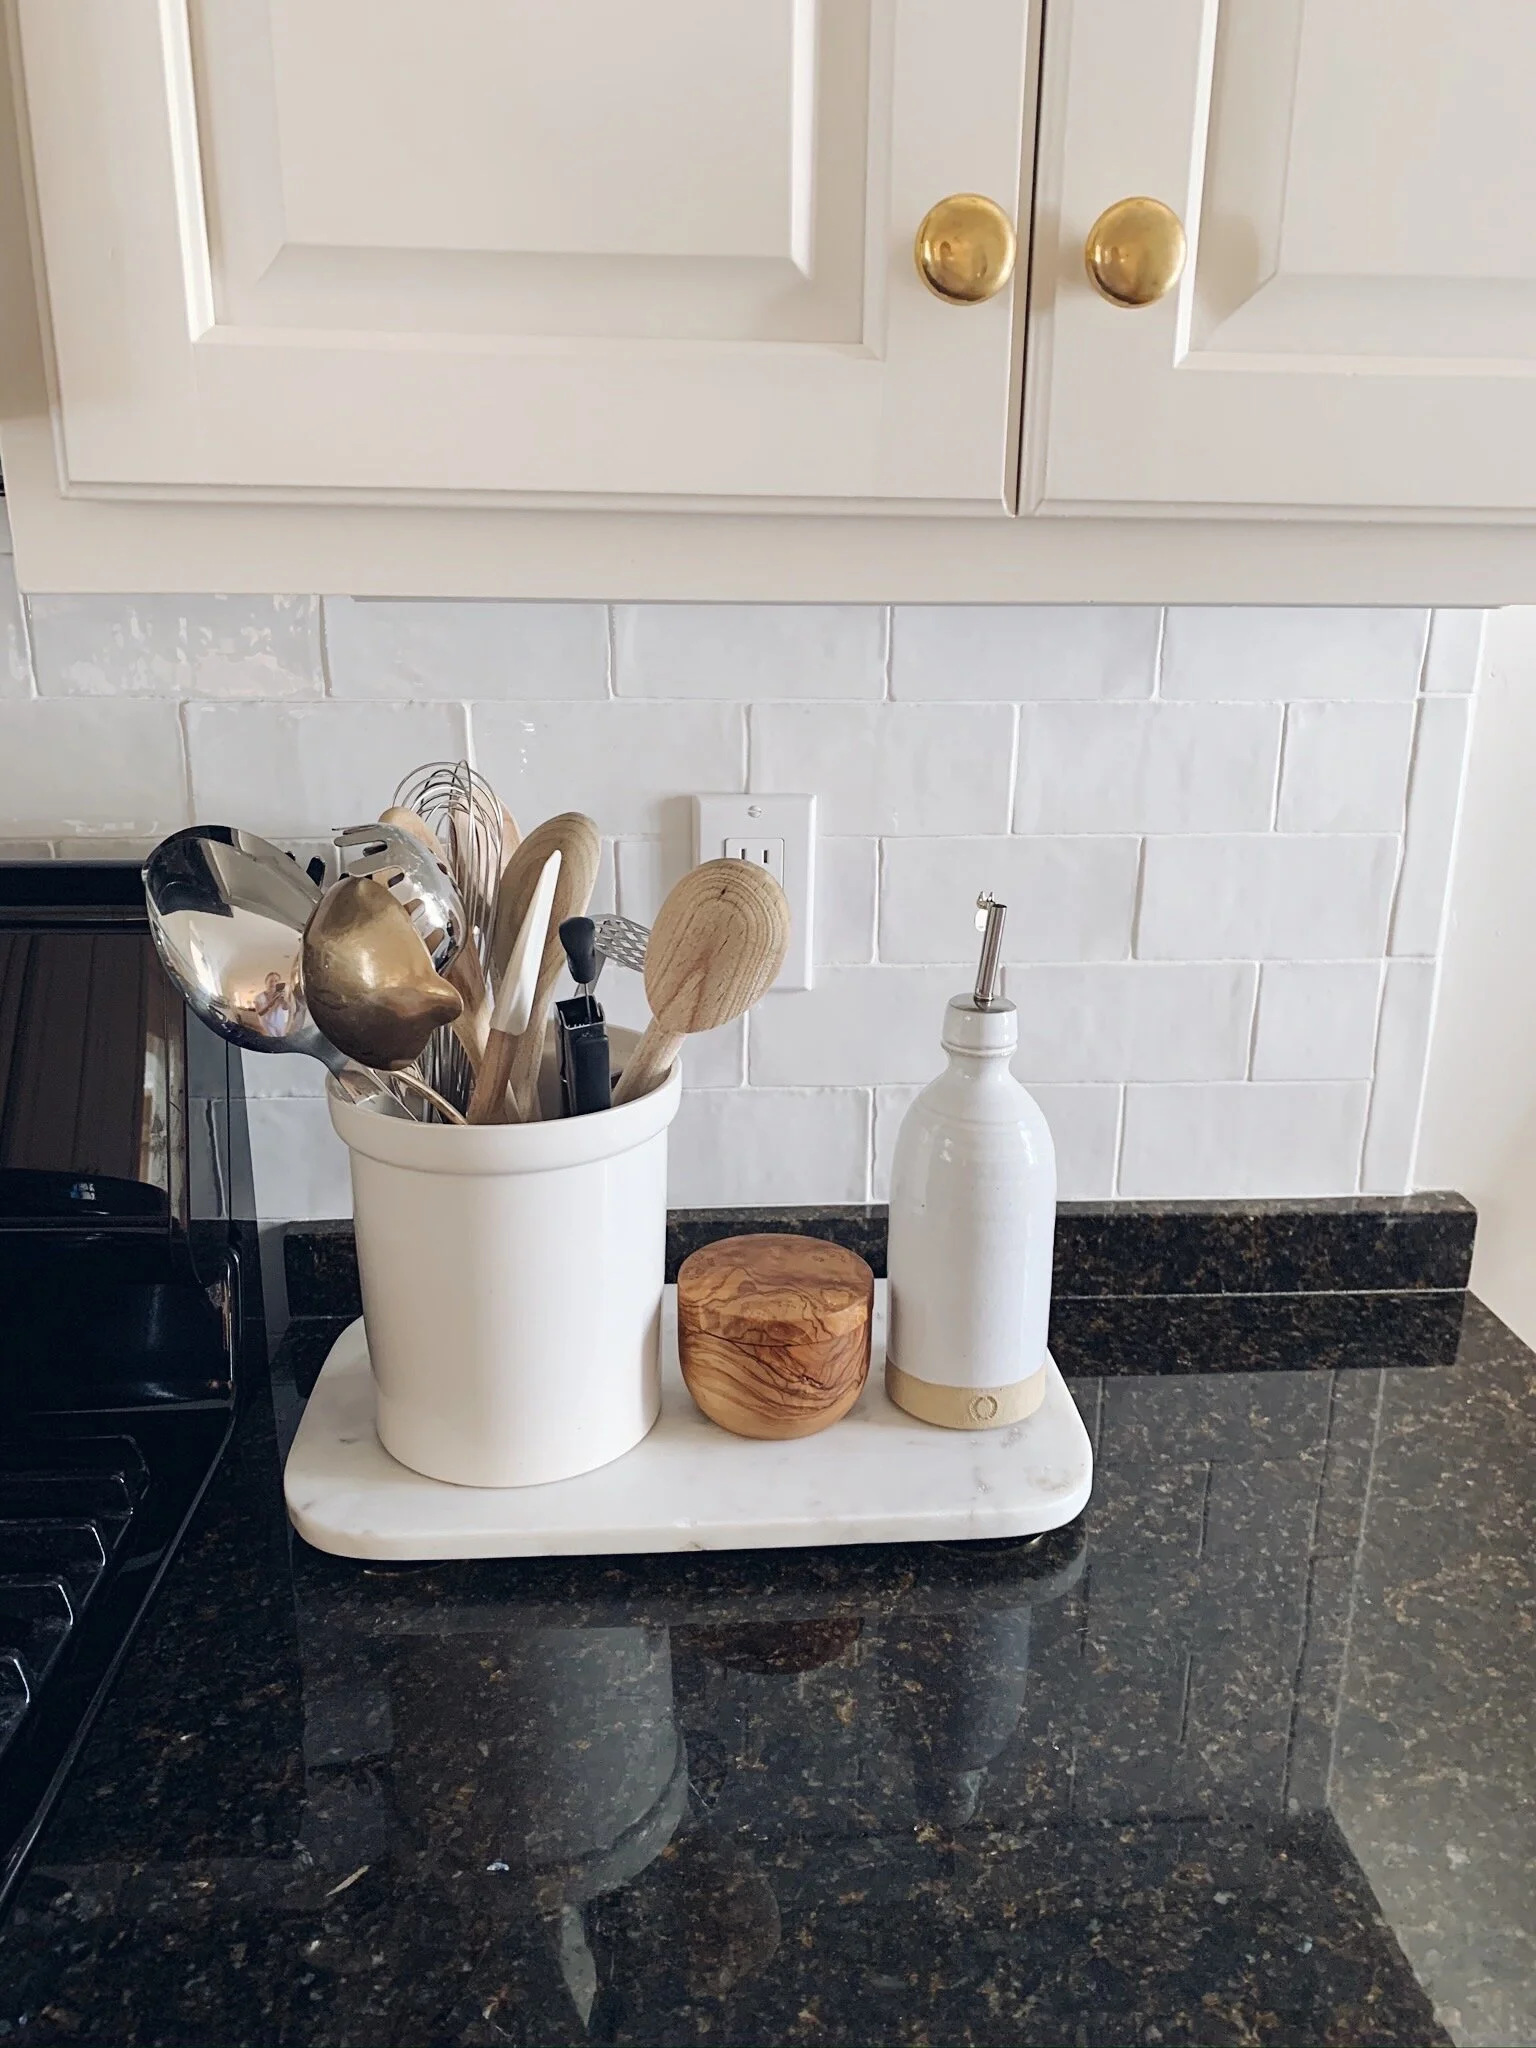
After a few months we committed to the shift (good thing because uh… it wasn’t exactly possible to put the cabinets back together whoops) and our contractor stepped in to formally remove the cabinets, replace them with shiplap, and add supports for the countertop. At this stage they also swapped out the dated travertine backsplash for a handmade white subway tile and replaced the light over the sink.
A few months later we were ready to take the project over the finish line and had the cabinets professionally painted. I’ve been seeing a lot of wood tones coming back lately so I almost kept the wood cabinets and replaced the countertops instead (our budget allowed for one or the other). The cherry stain was just so orange, especially against the yellow finish on our hardwood floors, so I resisted my gut and went with painting instead. We also knew we were good candidates for painting our existing cabinets for a few reasons:
1) They are solid wood so we didn’t need to worry about peeling veneer or durability
2) There were no visible hinges that would look dated and/or limit our options to swapping the hardware
3) The cabinets were maple so we weren’t concerned with veining or staining seeping through (which can happen with knotty pine, etc)
4) The cabinets were a very simple shaker-style door without any funky trim pieces or dated fronts
5) We were able to salvage the cabinet wall next to the washer dryer and just move it over to finish that cabinet wall, so we didn’t need to spend any money on customizations
We went with oil-based paint for durability. This is controversial as it emits pretty nasty VOC’s and has a reputation for yellowing over time. We trust our contractor however and they felt strongly we should go with oil for the best, hardest finish. We decided to move out during the job and stayed with our in-laws for the week they were painting, and the week after just to be safe and to let our house air out. There is no contest that the finish is amazing - it’s the closest I can imagine to a premium factory finish. If you are totally anti-oil however, I think Benjamin Moore Advance is a really great alternative option and have had incredible durability results using that on furniture. If we didn’t have somewhere to stay throughout the process I probably would’ve asked them to use that.
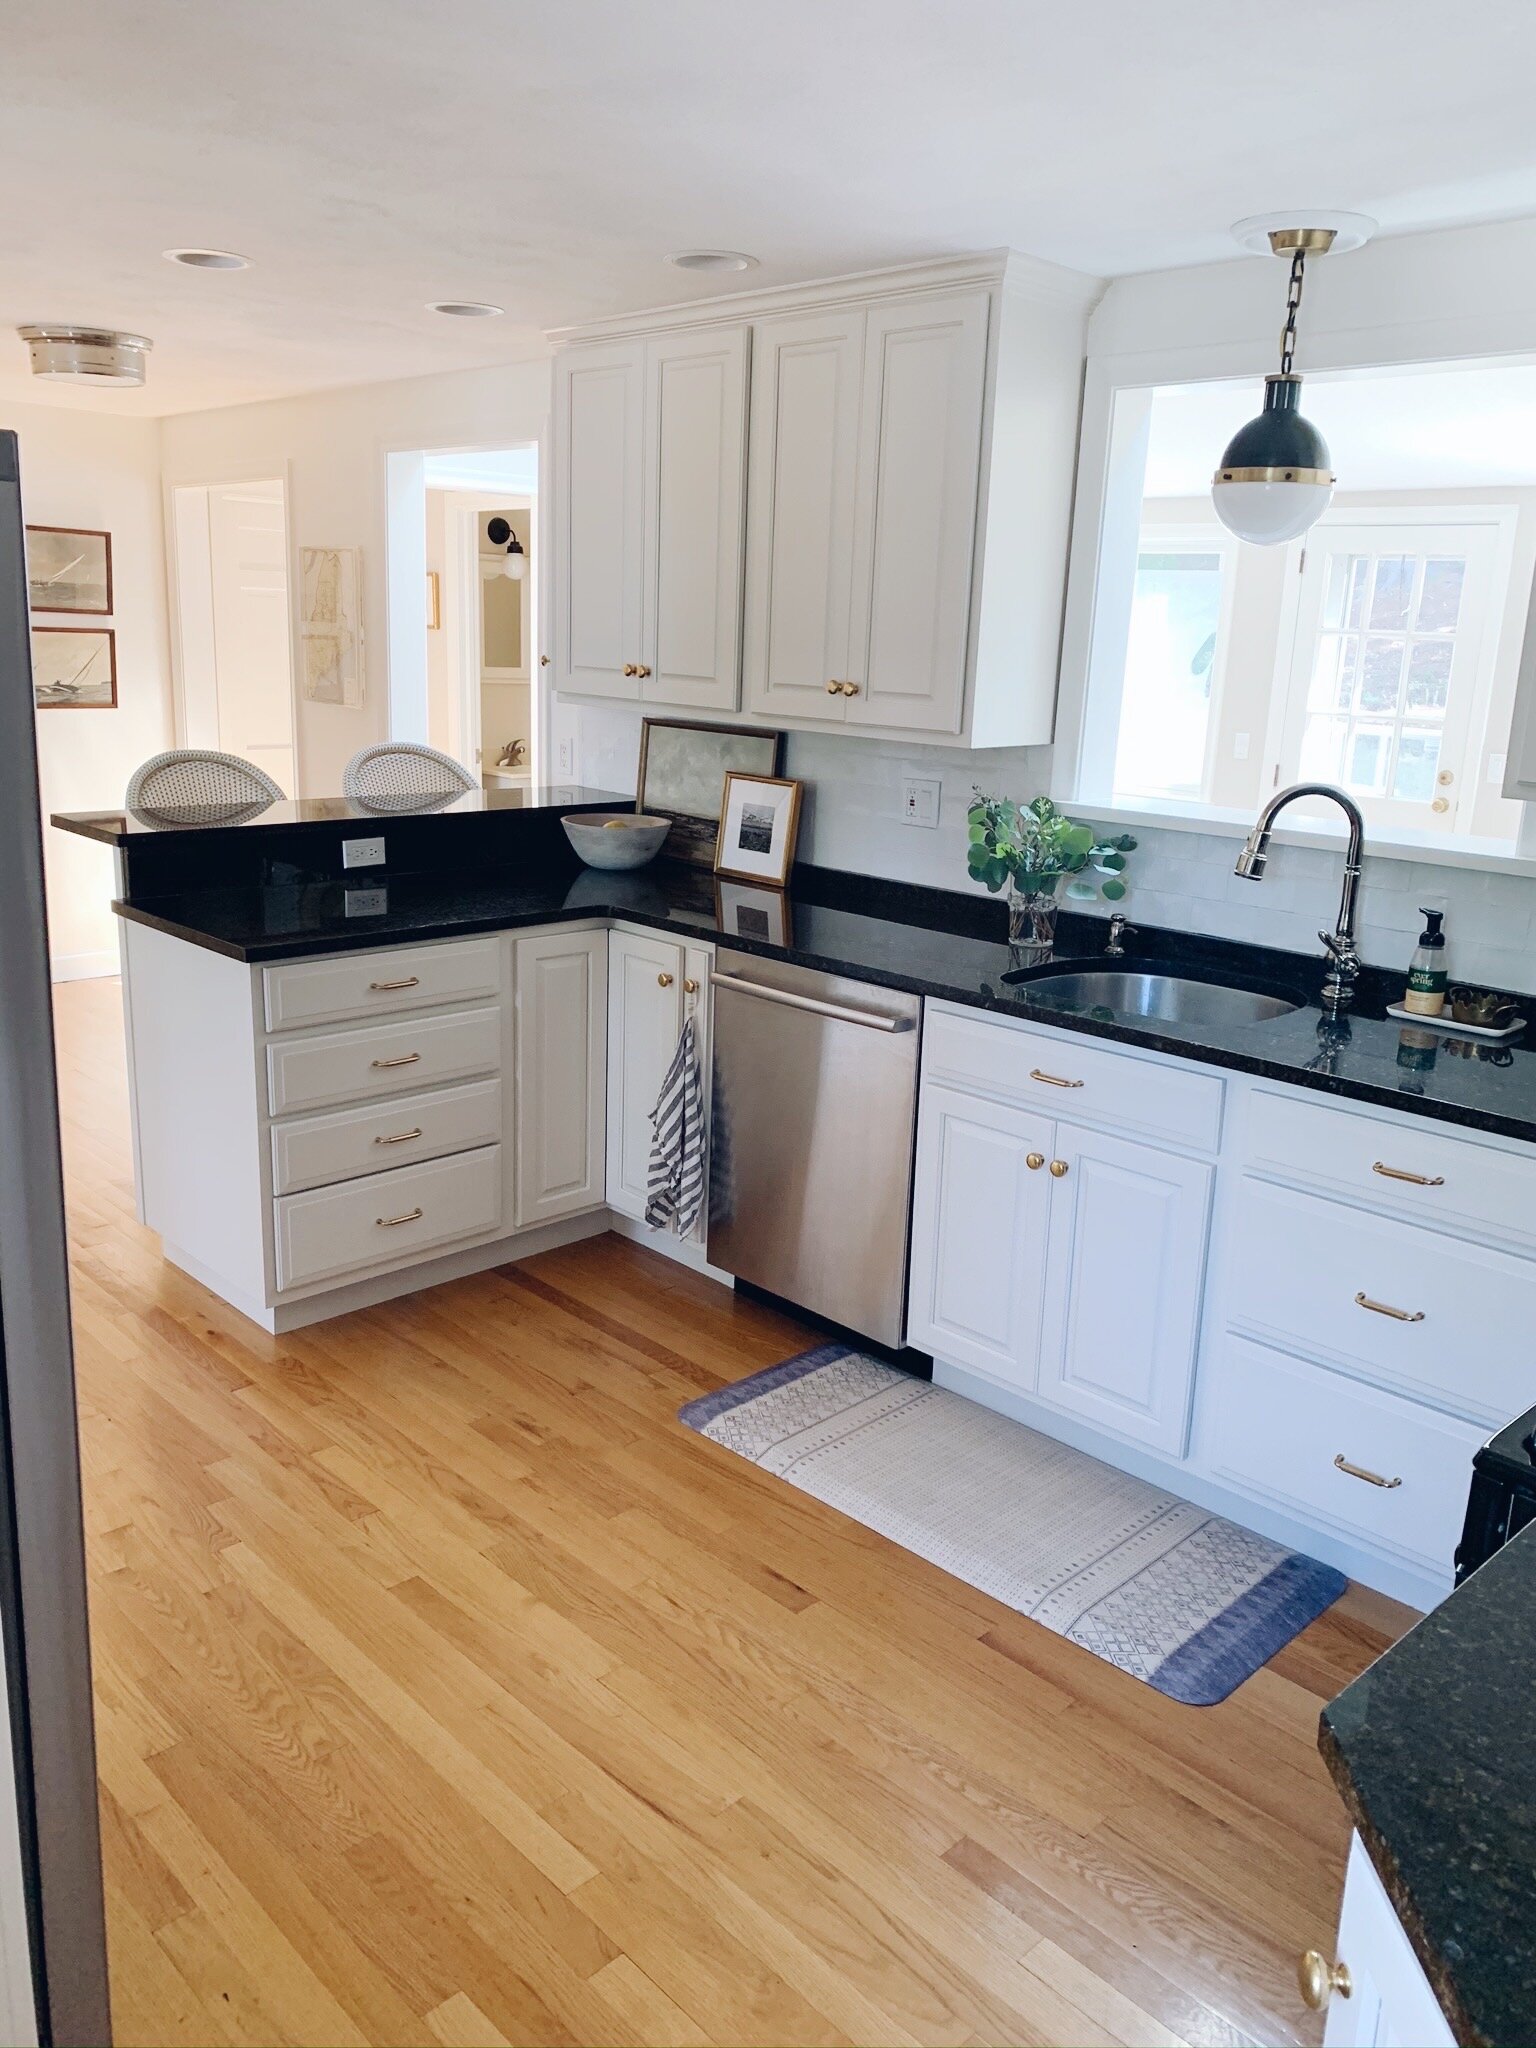
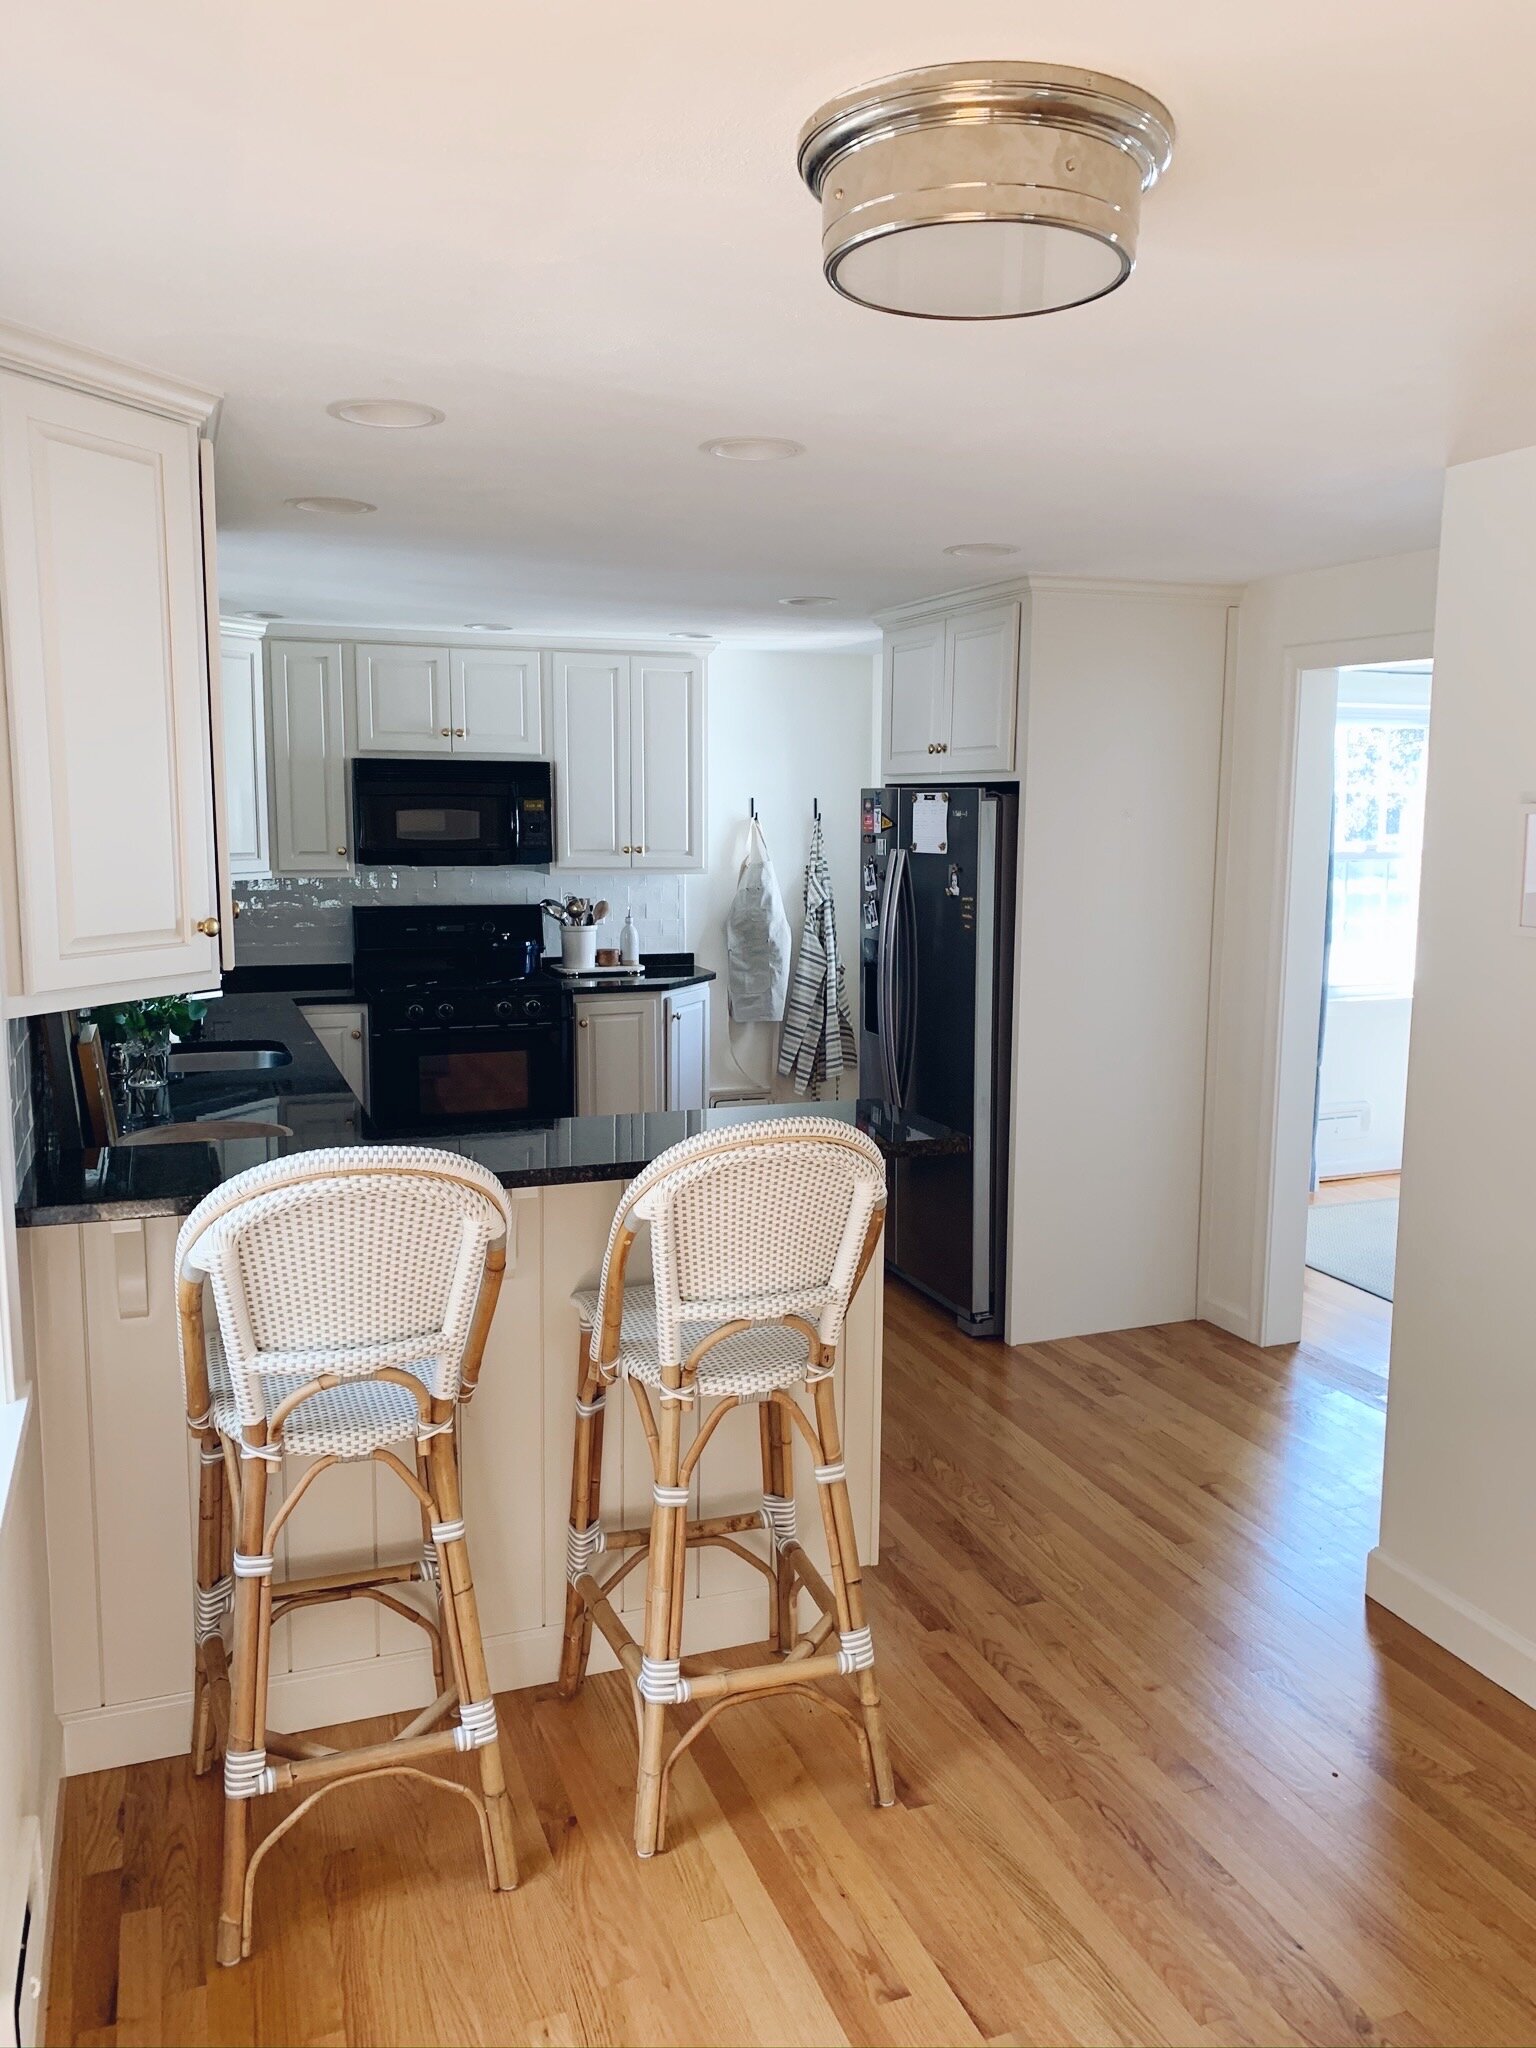
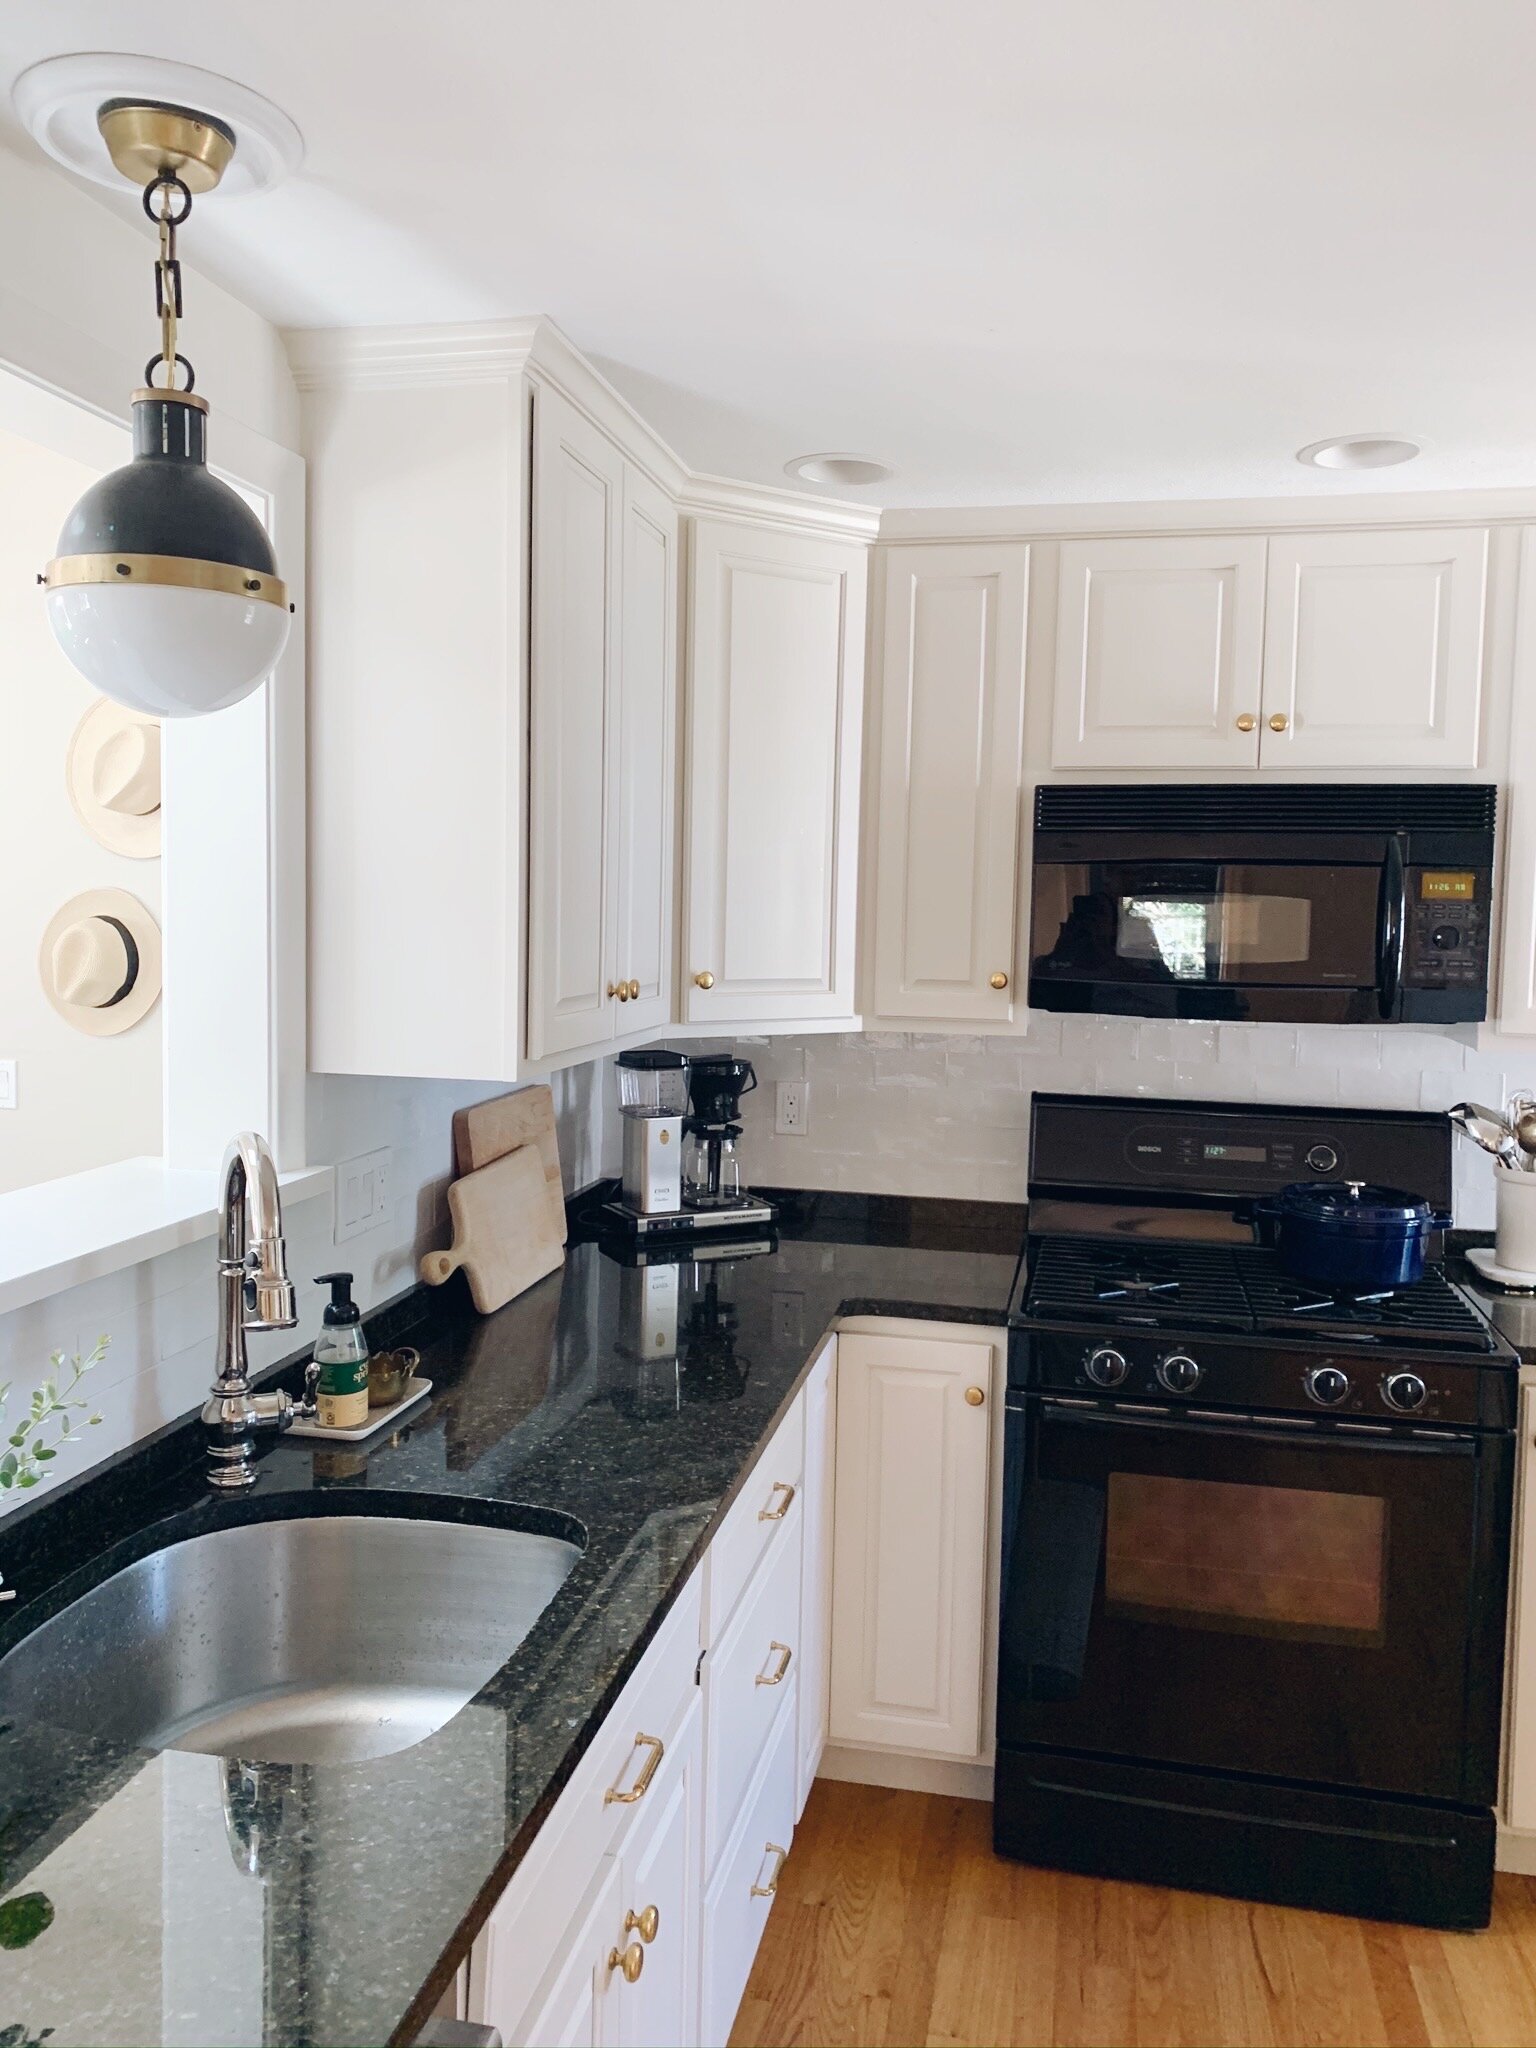
ANYWAY. I had fully planned on painting the cabinets Simply White (all paint in our home is Benjamin Moore) but then got cold feet out of concern that it’d look a bit 90’s with our shiny dark granite and black appliances. I wasn’t trying to put “lipstick on a pig” per say but obviously I wanted our investment to truly feel like an upgrade. With C’s support I changed directions and went with Fog Mist, the super light greige that was already on the kitchen walls. It really warmed things up and took your eye away from the dated granite. It also prevented any color issues with the white subway tile and really allowed the backsplash to pop as a crisp white. While the cabinets can look white in photos, in real life the contrast is more obvious:
We also replaced the hardware with unlacquered brass which even six-months later is already dulling out to a beautiful patina. The drawer pulls were a beast to replace, I was a touch off with my measurements and didn’t realize until AFTER the painting was complete that they were a totally random European size (96mm). There already aren’t a ton of unlacquered brass option (exactly 0 at big box stores etc) but there were virtually two in this size I could even find online. I ended ordering these from Baldwin - they are made to order so it took a few weeks for them to arrive but I really love them! They weren’t cheap but I only needed 7 so that made it slightly less painful.
Lastly, we painted all of the walls Simply White to add some contrast to the cabinets and topped the trim off with a fresh coat as well (if you are tracking - yes, we swapped the wall color and the cabinet color ;). The cherry on top was our Kohler Faucet - I never knew I could love a faucet so much but oh my goodness, the spray functions on this beauty are life changing.
I couldn’t have my marble countertops but on the bright side, this granite is fine shape and I was able to add marble and wood accents here and there. Part of me still wants to replace the counters to really make the space feel finished but it would take the budget a little out of the range we felt good about investing, knowing that we plan to do a full remodel down the line that will really maximize the space. It’s a good sized room, especially now that we’ve improved the flow with the dining room and eliminated the need for two eating areas, so it’s worth saving our pennies vs. adding any more funds to this temporary update.
So that’s it! I will add some links and shoppable sources below, and keep scrolling for all of the final photos!:
Contractor: Liljedahl Brothers
Paint colors: Cabinets - Benjamin Moore Fog Mist / Walls & Trim: Benjamin Moore Simply White
Subway Tile: exact source unknown (sorry!!)
Dining Room Rug (table is a Craiglist find, chairs are vintage, end chairs are IKEA, curtains are HomeGoods)
Kitchen Mat (exclusive House of Noa x @MegHall design!)
Pendant Light (size small) / Flush Mount (size large) / Dining Room Light
Barstools were gifted from a previous partnership with Serena and Lily but I can’t sing their praises enough - wipe-clean, kid-friendly, timeless… worth the hype!!
Shop the full post below: